Thursday, December 8, 2011

Public Service Announcements: Finishing Strong!

DO NOW: Visit the Rondebosch Boys’ High School, South Africa, Website and see what their school is like.
==============

For the rest of the Semester we will be focusing on our Photoshop skills and using them for social good.  

  • Your task is simple...  Create a Public Service Announcement (PSA) about something you care about in your community.  
  • You can come up with a new idea or use one of the two ideas you already came up with (check your email for your response to the form "Think again of the community that you did your identity map of..." to see your responses)
  • Be creative! Cut up multiple images and make them your own!
  • You MAY take inspiration from somebody else's images but don't use an already photoshopped or manipulated image in your project!
  • [Click here to see the examples of PSA's and prompts from our earlier lesson]
Your PSA must conform to the following requirements:

      1. 8 1/2 x 11 inches OR 8 1/2 x 14 inches in size [Photoshop>Image>Canvas Size]
      2. Have a clear and simple social good message using few words for the main message [Click here to see the examples of PSA's and prompts from our earlier lesson]
      3. Have a graphic, be it artwork or photography or both.  Particularly artistic all TEXT PSA's will be considered [Click here to visit the Adobe help document on working with type in Photoshop CS3]
      4. Have zero profanity or inappropriate elements as determined by John or Coach Grimm
      5. Be something you are willing to have posted in the glass case in front of the school for everyone to see

REMEMBER: Your PSA is supposed to benefit your community.  When you have completed one you will email it to John in the following format.

  1. File type = JPEG
  2. Compression/quality = 8 or higher
  3. Filename = PSA - Your Name.JPG
  4. Subject = PSA - Your Name
  5. Body Text =
    1. Explain WHO your AUDIENCE is for this PSA
    2. WHAT the SOCIAL ISSUE you are addressing is
    3. WHY this PSA helps with this issue
  6. TWO self grades
    1. Technical Mastery = How well did you use Photoshop for this PSA? Show me where you "did good"
    2. Application of Knowledge = How well does your PSA address your social issue? Why?

EXTRA CREDIT:

  1. Do more PSA's
  2. Do holiday cheer signs for the school


Tuesday, December 6, 2011

DMIN Community Word Online Student Conference


STUDENT GUIDELINES FOR PARTICIPATION
Facing History and Ourselves promotes the development of a more humane and informed citizenry through civil discourse built upon tolerance and respect. Before you use this website, we ask that you read the following rules and agree to the Terms and Conditions of this site. 

Personal/ Account Information
Each student and teacher will have their own account in Voicethread.  This account identifies and tracks who posts which comments. 

Posting Responses and Comments
  • Responses and Comments

    As you explore the photos on this Voicethread, you will be able to respond to questions next to each of the photos. Your responses may be republished elsewhere as Facing History or John deem appropriate. Other people who are participating and respond to the same questions will be able to see your responses. As the author, you are responsible for the ideas reflected in your responses.

  • Prohibited Terms

    This website is a place for safe, constructive dialogue. You may not post potentially offensive or injurious material on this website.  Remember this is a school-based project so your participation should reflect that of your teacher’s classroom expectations.

Facing History and Ourselves may refuse to post or may remove any material that it believes is undesirable or in violation of these rules. We may also deny you access to this site or terminate your access if we believe you are violating these rules or infringing on other people’s rights.  If Facing History needs to take such action your teacher will be notified.


==================
Here is the link for the conference:

Your login is in the following form:
John_K@facinghistoryandourselves.ed.voicethread.com
(COPY it, PASTE it, put your own name and initial in it):
Your password is: 123456

Submitting your "Heads will Roll" Photo

Do Now: Get to work


Purpose (I will):
  • Complete my "Heads will Roll" PSD File
  • Including
    • 5 Edward Headed people
    • 3 color changes
    • 2 text boxes
  • DO YOUR BEST - Quality is being graded
At the end of the period 
  1. FILE>SAVE AS
    1. Name the file "heads will roll - Your Name"
  2. SAVE YOUR FILE AS A JPG
    1. Specify FULL QUALITY
  3. SEND JOHN@ENVISIONACADEMY.ORG AN EMAIL
    1. Attach the file to the email as an attachment using the attachment tools

Monday, December 5, 2011

Using TYPE in Photoshop


Do Now: For our final project of the semester we are going to make social issue public service announcements (and festive) posters :

Think again of the community that you did your identity map of.  If there was one MESSAGE that you could say to the people in your community what would it be?.

  1. Would you be trying to tell people to STOP doing something?
  2. Would you be trying to tell people to START doing something?
  3. Would you be trying to get people to NOTICE something?
  4. Would you be trying to get people to BELIEVE in something?
What do you YOU want people to HEAR?
 Please WAIT before continuing 
==========================


Today's Lesson:  PHOTOSHOP SPECIFICS #3
Using Type in Photoshop
Basic Skills
  1. Setting "Point" type
  2. Setting "Paragraph" type
  3. The Character panel
  4. Using layer BLENDING MODES
  5. Using layer STYLES
  6. Using layer EFFECTS
To Practice & Get Credit
  • Select a photo 
  • Add  TITLE text as Point type
  • BLEND the title text into the photo on the layer below it
  • ADD an EFFECT and/or use STYLES on the title text
  • Add some explanation/information as Paragraph text (making sure it is readable - look at Smokey ABOVE as example)
  • Save as a JPG and email to John@EnvisionAcademy.Org for credit when finished (today or tomorrow)
Extra Credit
  • When you are finished with the practice you may start working on a festive HOLIDAY message for the EA community!
  • The message can be anything school appropriate
  • The message may be serious ("STOP LITTERING", for example) but it must also be CHEERY to get credit!
  • Email it to John@EnvisionAcademy.Org for credit.

Tuesday, November 29, 2011

Painting with the color replacement tool

Do Now: Get your Identity Chart back from the pile and, on the reverse, answer the following question:

Think again of the community that you did your identity map of.  Answer the following questions.

  1. Who lives in your community and who does not? 
  2. Has the makeup of your community changed over time? 
    1. What accounts for that change? 
  3. How do people in your community learn who belongs and who doesn’t?


==========================
 Please WAIT before continuing 
==========================


Today's Lesson:  PHOTOSHOP SPECIFICS #2
Learn to Paint with the Color Replacement Tool

    • I will learn to use the Color Replacement Tool
      • Choose a color with the Color Picker
      • Select the Color Replacement BRUSH  from the Brush Tool button
        • Set Mode to Color
        • Set Limits to Find Edges
        • Set Tolerance to 30%
        • Choose One of the three eyedropper tools
        • Paint carefully!
        • Use [ ] to change your brush size
    • I will APPLY this Technique by
      • Continuing to work with the  “Heads will Roll” photoshop example 
      • Changing Edward’s shirt color
      • Changing one piece of clothing on three people in the photo
      • You should be able to turn the colored clothing "on" and "off" using layer selection

Monday, November 28, 2011

Select and Transform in Photoshop

Do Now:  Create an identity chart ON PAPER for your community
(This is in preparation for our international online seminar next week)

Just like individuals, communities like Oakland have identities, and factors such as geography, politics, economics, and historical events influence the identity of a community.

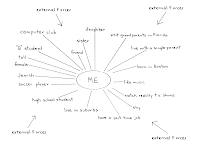
Create an identity chart for your community by drawing a circle with OAKLAND (or your town if not Oakland) in a circle in the middle. Around that circle, write the words and phrases that YOU use to describe your town.

Use the printer paper by the door if you don't have your own.  At right is a clickable example of an identity chart for an individual:

Hang on to your chart while we discuss it and then turn it in for credit.

==========================
 Please WAIT before continuing 
==========================


Today's Lesson:  PHOTOSHOP SPECIFICS #1
Learn to cut an object, place it on its own layer, and manipulate it!

    • I will learn 3 new Photoshop Techniques
      • The Quick Selection tool (and REMOVE)
      • Layer>New>Layer via copy
      • Edit>Free Transform
        • Erase, Clone, Blur (oh my!)
    • I will APPLY these Techniques by
      • Downloading “Heads will Roll” photoshop example file from here
      • Cutting Edward’s head off and placing it in its own layer
      • Pasting his head on each of the 4 other bodies, transforming and blending the results to look as natural as possible.
      • You should be able to turn each head "on" and "off" using layer selection

Tuesday, November 22, 2011

More photoshop cloning and image repair resources

==========================
 Today's Assignment 
By the end of the period you need to email me
  1. Your Photoshopped Photo
  2. The SUBJECT should be "Your Name - Photoshop Image"
  3. Put a description of what you did to the photo and why you did it in the BODY of the email
  4. Send the email to  john@envisionacademy.org 

==========================
 Steps to complete today's assignment 

  1. Open Photoshop
  2. File-Open your photo 
  3. Edit using the tools we know so far - play around but HAVE A PURPOSE
    1. Color Correct, Crop, and Clone!
  4. File-Save As your photo as a JPG when done
  5. Open school email - send jpg photo as an attachment to john@envisionacademy.org
Below are some more resources to help you with this assignment AND and extra credit assignment you can do today if you finish early
==========================
 Cloning & Image Repair Tutorials 

  • Cloning something to DUPLICATE it (same tool, different use)

==========================
 Extra Credit Assignment 
Extra credit:  Download the image on the right (ctl+click, blah, blah) and save it to your student drive.  Open it in Photoshop and do your best to remove the pipe and the lighter from the girl's hands.

If you don't finish you can turn it in after the break.

Wednesday, November 16, 2011

Finishing your iPhoto projects


Purpose: 
      • For an “A” you must be finished with BOTH iPhoto projects by the END of THIS Class
    • I will finish selecting, cropping, correcting, and categorizing my Field Day & Community photos.
    • I will have SIX (6) Albums with my “best of” Field Day photos
    • I will have ONE (1) Album with my COMMUNITY photos & I will know my ‘word’
          • I will show these albums to John

Monday, November 14, 2011

iPhotoshop Day 6 - Catching-Up & Organizing

Do NOW: 
The do now is located on THIS FORM
.
---------------------------------------------
.
Purpose: 
    • I will import the pictures I took last period & this weekend into iPhoto
      • I will properly TITLE the EVENTS
      • I will begin to select, crop, correct, and select my 5 best ‘community’ photos
    • I will continue to select, crop, correct, and categorize my Field Day photos.

Wednesday, November 9, 2011

iPhoto Project Image Requirements


    • Minimum 50, Maximum 150
    • No more than 30% with effects
    • all with “rule of 3rds” when possible
    • 90% Cropped
    • iPhoto ALBUMS created and populated with the following:
      • 5 best cropped in
      • 5 best cropped OUT
      • 5 best straightened
      • 5 best enhanced
      • Top 5
      • one natural art (blurry or other)

Thursday, November 3, 2011

(Lifehacker's) Photoshop Basics: Lesson 1 of


We are going to watch this video as a class.  It is a good, quick explanation of the basic tools in Photoshop.

This is the MANUAL for this lesson.  It is a good guide for you to reference as you do your work.
"Basics of Photoshop #01 - Manual"


---------------------------------
All of this material was developed by lifehacker.com (bless their hearts...)

Tuesday, November 1, 2011

It's the Inequality, Stupid!

Warm-Up:
  1. Choose a partner and sit with them
  2. ON BOTH OF YOUR COMPUTERS Go to: http://motherjones.com/politics/2011/02/income-inequality-in-america-chart-graph
  3. ON ONE OF YOUR COMPUTERS GO TO: https://docs.google.com/a/envisionacademy.org/spreadsheet/viewform?formkey=dGtpSnh6bDFaQXg4cXNzLTdpWkNtQ1E6MQ
  4. READ all of the graphic charts and then choose ANY three to respond to with your partner
  5. Prepare to share out one of your responses.


Film on Police Action

staying safe

Monday, October 31, 2011

History in the making

Do NOW:
5 Minutes: Visit this tumblr site and read the postings until the buzzer sounds (http://wearethe99percent.tumblr.com/)
 Now, think about what these people are talking about... do you get it?  Are YOU part of the 99% Why or Why not?
==========================================
Wait - do NOT go on until instructed
Well now, what is REALLY going on?
==========================================

And now for some poetry
==========================================

Haven't we been here before???

Friday, October 28, 2011

Congratulations Class of 2015! 


You all did such a great job last night!  
One of the most important things we can do after a great success (or a challenging moment) is to reflect on how we got there so that we can repeat the good and avoid the bad.


Please use this form to submit your reflection.  To get a grade for the exhibition you MUST submit your reflection.  CLICK HERE


If you are new and didn't have to present, write your answers from that perspective...


If you don't have a school email account get with John so that you can fill out the reflection.

Monday, October 24, 2011

Exhibition is THIS THURSDAY!


Tired?  ME TOO!
Here's the Drill for Mon-Tues-Weds in Digital Literacy...


  • John will be dedicating his time to the people doing recordings FIRST, and on others during the moments in-between.
  • If you are still adding EVIDENCE to support your THESIS please sign-up on the board.  I will help you in-between recordings.
  • If you are finished then help others or do quiet work.  Help keep the room quiet for the recordings.
  • If you are getting ready to record please make sure of the following:
    • Your Story has a SOUNDTRACK
    • Your transitions are NOT on AUTOMATIC
    • You have a BLACK SLIDE at the end of your slideshow
    • Your narration is 12 PT black NOT BOLD Normal Readable Font
  • If you are still adding narration hurry up.
    • REMEMBER: You wrote most of this in your Testimonio & Memoir already!
xoxox
J

Wednesday, October 19, 2011

Finishing Your Digital Story


Almost there!


For those that are ready we have a BRAND NEW MICROPHONE set-up for recording! Sign-up on the door.


We've discovered that it is best to print your narration so make sure it is in a 14 pt font and not bold.


Work hard, refer to the older posts for previous steps, and hang in there... you WILL get this done!


J

Monday, October 17, 2011

Writing your Narration

Welcome!
Your Digital Story is DUE this Friday.

To write your narration go to the "View" menu in Keynote and turn on "Presenter Notes"
Write your narration is the spot below the slides!

Thursday, October 13, 2011

Completing your Digital Story Slides


By today you should have already 
completed the following:
  1. A BRAINSTORM of the themes and important events that run through all three of your projects and (Timeline, Testimonio, Memoir)
  2. A THESIS from that brainstorm.  The thesis should be a short, declarative sentence.
  3. As LIST OF EVIDENCE, ideas, quotes, and events drawn from your projects, that support your thesis. Without this list of evidence you cannot create your Digital Story.
  4. All of these should be recorded on your Google Doc Outline.
  DO NOW! 

Whatever you have NOT done from the above list!
[Use the links to the right to find the 
posts that cover those topics]

  Classwork... 
* WE ARE IN PROJECT MODE *
  1. Work as hard as you can
  2. Get answers to your questions before you get lost or frustrated!
    1. Check the BLOG for answers first INCLUDING past blog entries!
    2. Then ask the students sitting near you
    3. Then, after doing the above,  GET UP and go to John
 Today: 
Once you have your list of evidence you can now get started on your slide show.
  • Remember that you need at least three slides from each project
  • You may cover 1 event/idea or more on those slides
  • You may mix slides/projects to tell the story the way you wish
  • You do NOT need to use words - be artistic and use images, pieces of ideas, whatever you like to convey your story in a creative way.
Once you have your slides finished you can now get started on adding your music and writing your narration.

Wednesday, October 12, 2011

Listing Your Evidence


REMEMBER: YOUR Completed Digital story 
is DUE Friday October 21st!


  DO NOW! 
    • GET TO WORK, don't stop, work the entire period.

  Classwork... 

* WE ARE IN PROJECT MODE *
  1. Work as hard as you can
  2. Get answers to your questions before you get lost or frustrated!
    1. Check the BLOG for answers first INCLUDING past blog entries!
    2. Then ask the students sitting near you
    3. Then, after doing the above,  GET UP and go to John
 Today: 
You should have already finished your THESIS...  If you have NOT then you need to get with John quick.  You can find him sunning by the window next to Natalie's desk...
 Once you have finished your THESIS then ORGANIZE YOUR EVIDENCE.
Evidence is those things from your three projects (Timeline, Testimonio, Memoir) that supports your thesis.

If your THESIS is "I am not who you think I am!" then your evidence should support that idea - it should show WHY you are not who we think you are! 
    1. Open your Google Doc Outline 
    2. ADD a new section to the outline called EVIDENCE.  
    3. In this evidence section write down the specific pieces of evidence from your three projects (Timeline, Testimonio, & Memoir) that you plan on using in your Digital Story.
    4. THIS EVIDENCE WILL BE THE THINGS YOU TALK ABOUT ON YOUR SLIDES AND IN YOUR NARRATION.  IT SHOULD DIRECTLY 'PROVE' YOUR THESIS. 
    5.  If this confuses you then ask a neighbor who has completed this step.   
  1. Once you know what story you are telling (THESIS) and how you are going to tell it (EVIDENCE) then you can START ON YOUR KEYNOTE SLIDES. 
  2. LASTdo an exit ticket before you leave. 

Tuesday, October 11, 2011

Finding the THESIS for your Digital Story

REMEMBER: YOUR thesis is simply the thread that ties all three of your projects together!


  DO NOW! 
  • If you have NOT already done so, open your Digital Story Project Outline from your Google Docs and enter your THESIS (which you did as homework over the weekend).  
    • When finished open the COMMENTS in the upper right hand side of the document, "show the comments stream",  and add a comment saying that you are done with your thesis.  
    • I will automatically get an email saying you have added the thesis if you do this.
  • If you already added your THESIS to your outline on Google Docs then:
    • Open the Outline and then open the COMMENTS in the upper right hand side of the document, "show the comments stream", and add a comment saying that you are done with your thesis.   
    • I will automatically get an email saying you have added the thesis if you do this.
    •  THEN ADD a new section to the outline called EVIDENCE.  
    • In this evidence section write down the specific pieces of evidence from your three projects (Timeline, Testimonio, & Memoir) that you plan on using in your Digital Story.  

  Classwork... 

* WE ARE IN PROJECT MODE *
  1. Work as hard as you can
  2. Get answers to your questions before you get lost or frustrated!
    1. Check the BLOG for answers first
    2. Then ask the students sitting near you
    3. Then GET UP and go to John (or call him over if he is VERY near)
 Today: 
  1. BEFORE you can begin on your keynote you must have a USABLE THESIS!  If you did NOT accomplish this as homework or during the Do Now then you MUST do this before you do anything else.
    1. If you need help with your Thesis John will be working with a small group near the door.
    2. If you don't need help then GET IT DONE!
    3. When finished with your thesis open the COMMENTS in the upper right hand side of the document, "show the comments stream",  and add a comment saying that you are done with your thesis.  
      1. I will automatically get an email saying you have added the thesis if you do this.
  2.  NOW ADD a new section to the outline called EVI DENCE.  
    1. In this evidence section write down the specific pieces of evidence from your three projects (Timeline, Testimonio, & Memoir) that you plan on using in your Digital Story.
    2. Once you do this then your outline is complete enough to begin work.
      1. As you work on the project remember to write down any change in your ideas or thesis on the outline.  If you don't you will forget them!
  3. THEN start on your Keynote by laying out ALL 12 slides,  Transferring your ideas from the outline to each one.
    1. You can erase your 'notes' from the slide later, but lay out your outline in slide format so that you can see if you have enough to complete the Digital Story.
  4. LASTdo an exit ticket before you leave. 

Friday, October 7, 2011

Digital Story Project Requirements


Do NOW!
Log in to your SCHOOL Google CALENDAR and try to add a calendar to it called "Homework".

============================================
Purpose
  • I will understand the requirements and deadlines of the Digital Story Project 
  • and I will add the project DUE DATES to my SCHOOL GOOGLE CALENDAR (with alerts)
  • and I will finish my themes & begin my thesis
  • and I will submit an exit ticket with my progress


============================================
Agenda
  1. Introduce project requirements
  2. Place project dates on Homework Calendar with alerts
  3. Open Digital Story Project Outline
    1. Manke sure you are sharing the outline with john@envisionacademy.org

============================================

Project Description
    • Projects Must:
    • Have a unifying THEME
    • Be done in Keynote
    • Have a minimum 12 slides
      • Introduction (Name, etc...)
      • Thesis - what are the themes/connections between the three pieces of work?
      • 3 slides about Timeline Events
      • 3 slides about your Testimonio
      • 3 slides about your Educational Memoir
      • Conclusion
    • Have a single unifying song for the soundtrack
    • Have a Voiceover Narration for the entire slideshow
Slides can be pictures and/or words 
- creativity will be rewarded - 

Wednesday, October 5, 2011

Google docs!

I will review my effort on the Digital Timeline Project in order to improve my work for the future AND I will learn how to use Google docs to plan my next project by sharing an outline with John by the end of the period.

Agenda
  1. Looking back: reviewing the Digital Timeline Project
  2. Looking forward: the Exhibition
  3. Introduction to Google Docs
    1. Drawings
    2. Presentations
    3. Collections
    4. Spreadsheets
    5. Documents
  4. Creating your first outline
    1. Sharing the outline with john@envisionacademy.org


Tuesday, October 4, 2011

Get your work Done!

DO NOW:


15 Minutes! Go! Now! Do!
Post your current WPM in the Exit Ticket!


After "Time" is called, return BELOW for the lesson...
====================================
Hello!
As promised I am away today...


Fear not, your able substitute teacher is here to keep you safe (and to let me know how wonderful you were - and name names if you are not)


REMEMBER: Your Timeline and your Testimonio are past due...
and your work ramps up with Trevor next week...
and you have an exhibition Thursday, 
October 20th (a little less 
than 3 weeks away).

Please be mature and do what you know you should do:
Take Care of Business
If you are done, done, please be helpful, courteous, kind, and above all, QUIET.


You MUST have your work done by Tonight. 


Do the following, in THIS ORDER:
  1. Go finish your Timeline or revise it (add photos, links, more stories) to get a higher grade.
  2. Finish your Testimonio if it is not ready
  3. Do work for Trevor's class
  4. Do Math and Physics homework
  5. HELP A FRIEND WHO NEEDS TO GET THEIR WORK DONE...
  6. Show your Timeline to someone else who is finished and get feedback.
  7. Show it to the sub!
  8. If you are honestly done with everything you may quietly, with headphones or no sound, play one of our games located in the student drive, or kill some zombies.  Heaven help you if you play games and don't have all your work done, though.
  9. Submit an exit ticket or resubmit your Timeline before you go...

You may listen to music, using headphones, at an appropriate level, only using Pandora or other playlist Players.  Do NOT use YouTube or other players that require your action.

Friday, September 30, 2011

Turn in your Tiki-Toki Timeline!


Today is the 
BIG DAY!


Today, by the end of class, or the end of lunch, whichever is later, you must submit your Timeline if you wish FULL CREDIT! 
And, really, who doesn't?

To finish your Timeline check the rubric (by clicking here) and try to get '4's on all of the tasks.

REMEMBER it is always better to turn in what you have and REVISE it later than to turn nothing at all in on the due date.

When you are ready, FILL OUT the SPECIAL 

THE FORM IS LONG, SO GIVE YOURSELF 
20 MINUTES OR MORE TO COMPLETE IT.

Tuesday, September 27, 2011

Adding Categories to your timeline

Hello beautiful students! 

Today we will begin to finalize our timelines.  

While we are adding and editing our Stories we will now also be categorizing them.  

Remember how my Timeline had "John the Teacher", "John the Father", and "Historical Event" as categories? Well, now that you have some events in your own timeline let's do some categorizing of your own events!

To categorize simply go to:

Admin -> Your Timeline -> Categories -> + Create New Category

Use the picture below to guide you...


Adding CATEGORIES to your timeline


Okay, that's the new skill for today!


For the Rest of the week we will be finishing our timelines by creating more personal or historical stories, scanning photos and documents, and fixing up each story to include links and visuals.

For the complete requirements visit this post: 

Five minutes before class is over don't forget to fill out the EXIT TICKET!

Wednesday, September 21, 2011

Continuing your Timeline

Howdy!  We have a loooooooooooooong period today and you will be mostly self-directed.


Take a look on the RIGHT hand side of the Blog as well... Notice the new section titled THE GRIND?  Those are links you will need every day while working on this project.

Your task is to complete 8 to 12 of the following three types of things (8 if you want a 'B', 12 if you want an 'A', more for extra credit.  Less for, well, let's not go there...)
    1. Scan a Photo or Document
    2. Enter a personal event with 3 lines of detail (add photo or link too if you can!)
    3. Enter a historical event with 3 lines of detail (add photo or link too if you can!)
Mix and match as your tastes & resources dictate...

Okay, get going.  I will be mostly helping people doing the scanning today so if you need help first ask a colleague then  GET UP and come ask me a question. 

Remember you need at least 8 items completed to get a good score today.  And if you don't fill out the exit ticket you get ZERO credit for today.

Cheers!


* if you get all the way to Flicker today please log your password here:  Flicker Login Form

Tuesday, September 20, 2011

Starting your timeline

Hello!  Yesterday was fun, wasn't it?  Remember to try out for the Ragged Wing Youth Ensemble NEXT Tuesday after school!


EVERYTHING YOU NEED TO KNOW FOR TODAY'S LESSON IS LISTED ON THIS BLOG (AS FAR AS I KNOW).  READ all instructions CAREFULLY. READ each section COMPLETELY before command+clicking the link after the instructions.


YOU HAVE 5 (five) TASKS DUE TODAY


---------------------------------------------------------------------
TASK 1


Now: Command+Click the following link and log your warm-up for Credit (come back here to the BLOG when you are done and do task 2)


---------------------------------------------------------------------
TASK 2

Finished POSTING your warm-up? Great!  Now, go to Tiki-Toki and REGISTER using a username and password you can remember. Once registered, create your first timeline.

Do not spend time on colors or pictures or backgrounds or you will not finish today's work.  You can go back and fix stuff up later! Enter ONLY this information:
  1. Timeline NAME = (Example) John's Family Timeline
  2. Start date = either your oldest grandparent's birth date (use Jan 1 if you don't know it) or 01/01/1955, whatever you decided to use
  3. End date = 09/20/2011
  4. Introduction = Something Short for now
  5. Push Create in the lower righthand corner!  

Once you have successfully registered and created your timeline come back here to the BLOG and do task 3.


Now, command+ click this link:


---------------------------------------------------------------------

TASK 3


How was it over at Tiki-Toki?  Did they treat you right?  Cool!  Now, record your username and password and Timeline URL by command+click the following link (come back here when you are done and do task 4):


---------------------------------------------------------------------
TASK 4


Now, go back to your Tiki-Toki TAB and enter your first event "STORY" (you can use the event you created for your warm-up or do a different one, your choice). Use the management tools that pop down from the right side. NOW ENTER AS MANY STORIES AS YOU CAN! It will save you time later!


(come back here when you are done and do task 5)


---------------------------------------------------------------------
TASK 5

When you are done (or when John tells you to 5 minutes before the end of class) come back here and fill out the Exit Ticket by command+clicking the link!